
The Tag Trio set gives you tons of options for your tag designs, and Design Ambassador Ardyth has an elegant idea for using all 3 on one shaker tag!
Good morning! Today I’m sharing a step-by-step tutorial for using all 3 of the tags from the new Tag Trio die set to make an elegant shaker tag.

First let’s look at the main supplies:
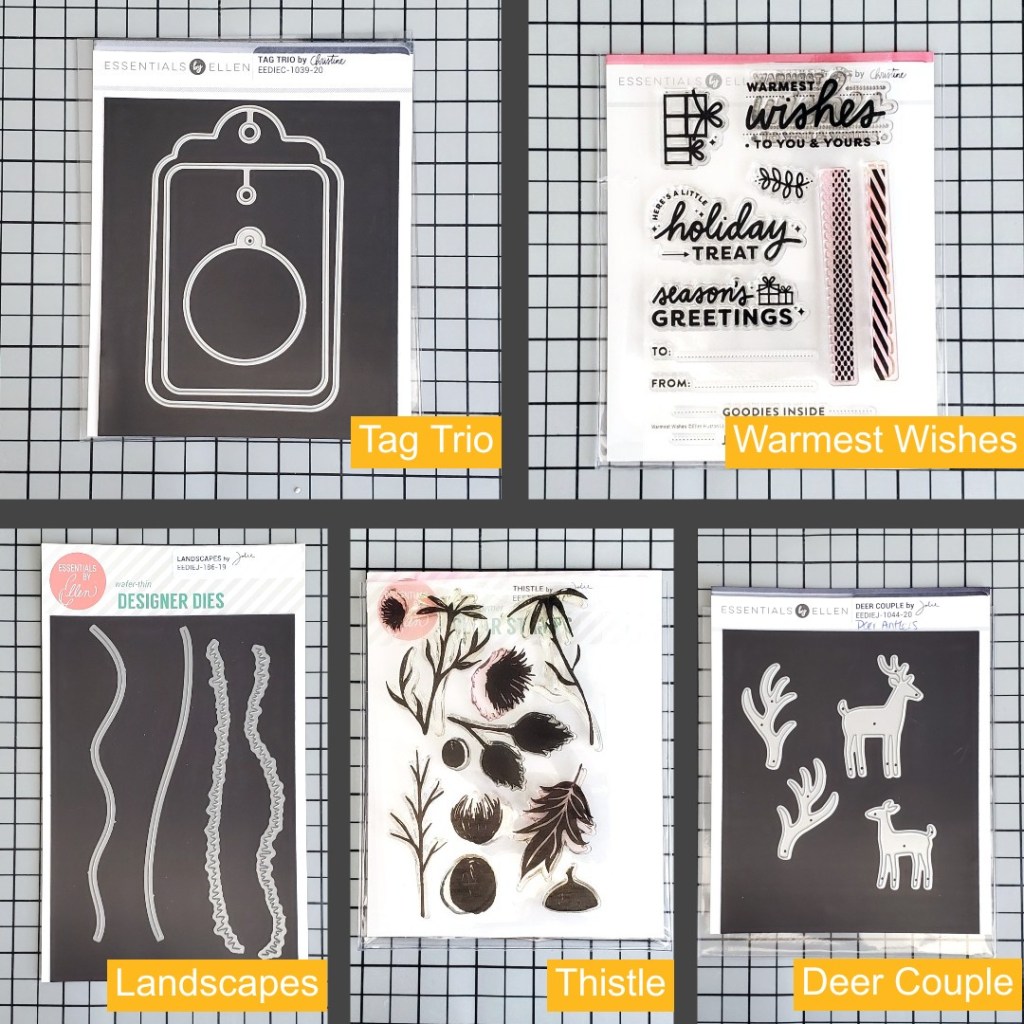
This is a mix of new products (Tag Trio, Warmest Wishes and Deer Couple (that I store with the Deer Antlers dies to save space!) and old (Landscapes and Thistle). I used them to create a shaker tag that can be used at Christmas, but because of the colours and outdoor themes, it also has a masculine feel that could be used at any time of the year.
This Tag Trio set creates a fabulous shaker tag that can be used for any occasion, and I’ve put some ideas for variations at the bottom of the post.

Step 1:
Cut the largest tag from white cardstock. Create a mask with the Landscapes die and blend Shea Butter ink over top, fading towards the top of the tag.
Step 2:
Blend Fiesta Blue, Suede Shoes and Black Jack inks from the top of the tag toward the bottom, fading out each colour so that the previous colour shows.
Step 3:
Spritz the tag with Avery Elle Clear Shimmer Spray – this adds shimmer, softens the blend and gives a beautiful velvety texture. Stamp the ‘tree’ (branch stamp) from Thistle. Use second generation stamping to fill in the forest and give the look of perspective.
Step 4:
Cut another of the largest tag from white cardstock. Use the rectangle tag from the set to cut from the centre (save this tag for another project!) and create a frame. Blend Black Jack ink onto the frame and spritz with the Avery Elle Clear Shimmer spray. This gives a lovely metallic look.

Step 5:
Cut another tag, this time from acetate. Glue it to the back of the frame to create your shaker window.
Step 6:
Use a double layer of foam tape to build your shaker walls. Make sure to add foam tape around the hole at the top, so that the two panels will be well supported.
Step 7:
Put Wow! Sparkles Celebration glitter into the shaker and cover with the ‘scene’ background.
Step 8:
Cut the circle tag from white cardstock, stamp ‘to/from’ and one of the ribbon stamps from ‘Warmest Wishes’ with Black Jack ink. Use Lawn Fawn twine to attach the circle tag to the shaker tag. Cut the male deer from Deer Couple out of white cardstock and glue it to the front of the shaker window.
Ideas for Variations:
- Adhere the shaker tag to a card
- Change the colours and images
- Change the type of shaker filler


4 Comments
Oh my goodness, Ardyth – I adore everything about this! *Thank you* for the clear, step-by-step tutorial as well! As someone who’s never done a project similar to this, I was interested to learn the process you took to achieve such outstanding results! This tag is so gorgeous, there’s no need to tie it to a package – it’s a wonderful present in and of itself!
Blessings,
Chrissy
Thanks so much Chrissy! I’m glad you liked it!
Thank you for sharing this terrific tag and tutorial! I really like the color combo you used. Being outnumbered by 2 sons & a hubby, I’m always looking for things that aren’t too girly that I can make for them 🙂
Thanks so much, Renee!