


Achieving that gorgeous, foiled letterpress look is easy with a few tips from Julie!


Hey, there! Julie here on the blog today with some lovely foiled holiday greetings–I’m not typically drawn to shiny things, but I will admit that foiled stationery gets me every.single.time.
And, I love being able to create this letterpress foiled effect myself, customizing my cards as I wish for that gorgeous, luxe look!
I also prefer to keep things simple, particularly when mass producing. In today’s video, I’m focusing on the foiling techniques/methods and tips used, but I left some additional design notes beneath each of the different cards.


Jingle All The Way* is scaled large enough to fill a card front with graceful cursive text.
The above foiled design was mounted onto an A2 kraft card that had been stamped with pine boughs using Versamark (watermark) ink for subtle texture and embellished with gold embossed and watercolored imagery from the Holiday Sprigs set.

Images from Holiday Sprigs were stamped with dye inks in Concord & 9th Poppy and Catherine Pooler Peppermint Scrub onto Bazzill Card Shoppe Wax Lips card stock. Dye ink absorbs and dries quickly onto this porous paper surface yet still leaves the surface smooth for hot foil stamping over the top with the Happy Holidays Hot Foil Stamp*
This layer was trimmed down and the edge embellished with metallic gold washi tape before being popped up onto a 4 Bar (3.5 x 5″ when folded) white note card (Neenah Solar White 80#). This design was also garnished with a holly cluster from Holiday Sprigs.
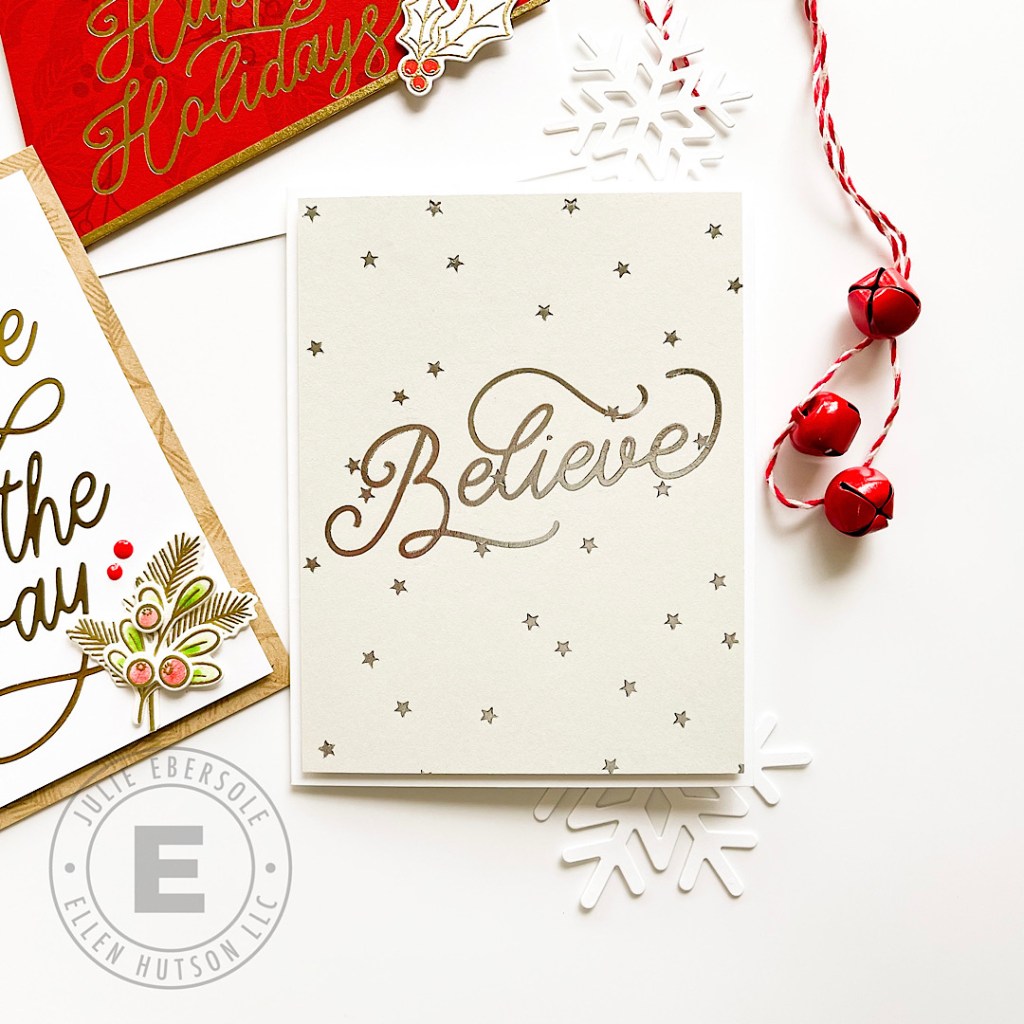
Believe* was hot foil stamped with Silver Foil onto Oyster Grey card stock, then hot foil stamped again, right over the top, with the Tiny Stars Hot Foil Plate*.
Yes, you can foil over the top of previous foiling and you can also choose to use different colors–if I’d had any on hand, I actually would have foiled Believe in red, and the stars with silver–a lovely combination for something like this!

You can also hot foil stamp your low profile metal dies; here the Antlers* were perfect for the inside of the card! A red nose was added with Christmas Red Stickles and a simple sentiment silver embossed beneath.
MORE TIPS:
- Every die cutting machine is calibrated slightly differently and different foiling platforms have slightly different features or are designed to work with specific machines. If you own a Gemini Jr. or full size Gemini, you’ll want to foil using the Gemini Foil Press Platform. Alternatively, if you work with a Spellbinders Platinum/Platinum 6 die cutting machine, you’ll want to foil using the Spellbinders Glimmer Hot Foil System. My experiences reference the Gemini Foil Press + Gemini Jr. as that is what I own and use.
- Crafter’s Companion/Gemini Foil Press and Spellbinders Glimmer Hot Foils are designed to work specifically with heat and pressure; Crafter’s Companion Foil is available in papercraft OR multi-surface formulas; the two formulas are NOT interchangeable, so make sure you choose the right formula for the right surface!
- MINC/Heidi Swapp, iCraft Deco Foil Transfer Sheets/Gina K Designs Fancy Foils are toner reactive and require toner printed images/paper and a MINC machine or heat laminator machine; they do not work with hot foil stamps.
- Foil should be placed with the matte/dull silver side against the paper surface, and then the hot foil stamp is placed against the “pretty” and shiny side”. Washi (removable) tape can be used for the hinge method, as shown in the video.
- Crafter’s Companion Foils and Spellbinder’s Glimmer Foils can be used interchangeably with hot foil stamps, but results will vary and may require some experimentation/testing to determine the best settings for optimal results especially if using off-brand foiling platforms. Start with lowest recommended settings (Gemini: low heat + 15 second timer) for your foiling platform (which should be included with your machine at time of purchase or available on the manufacturer’s website) Make notes of consistently successful settings for the style and size of hot foil stamp, brand of foil and brand/weight and type of paper surface:
- *When foiling Jingle All The Way/Believe/Happy Holidays, I used washi (removable) tape to secure a card stock shim (roughly the same size as the top plate, Neenah 80#) on one side of the top plate and made sure the shim was against my paper when sending through the Gemini Jr. In contrast, the Tiny Stars plate and the Antlers low profile dies have larger expanses of open space within their design; adding a shim will increase the pressure in those open spaces and result in considerable over-foiling.
- When possible, you can use small pieces of washi (removable) tape to pull the edges of a foil sheet “taut” against the paper; this helps keep the foil flat against the surface and can greatly reduce over-foiling.
- A little bits of over-foiling in unwanted areas can be gently sanded away using a white hi-polymer eraser and/or a sand eraser.


