
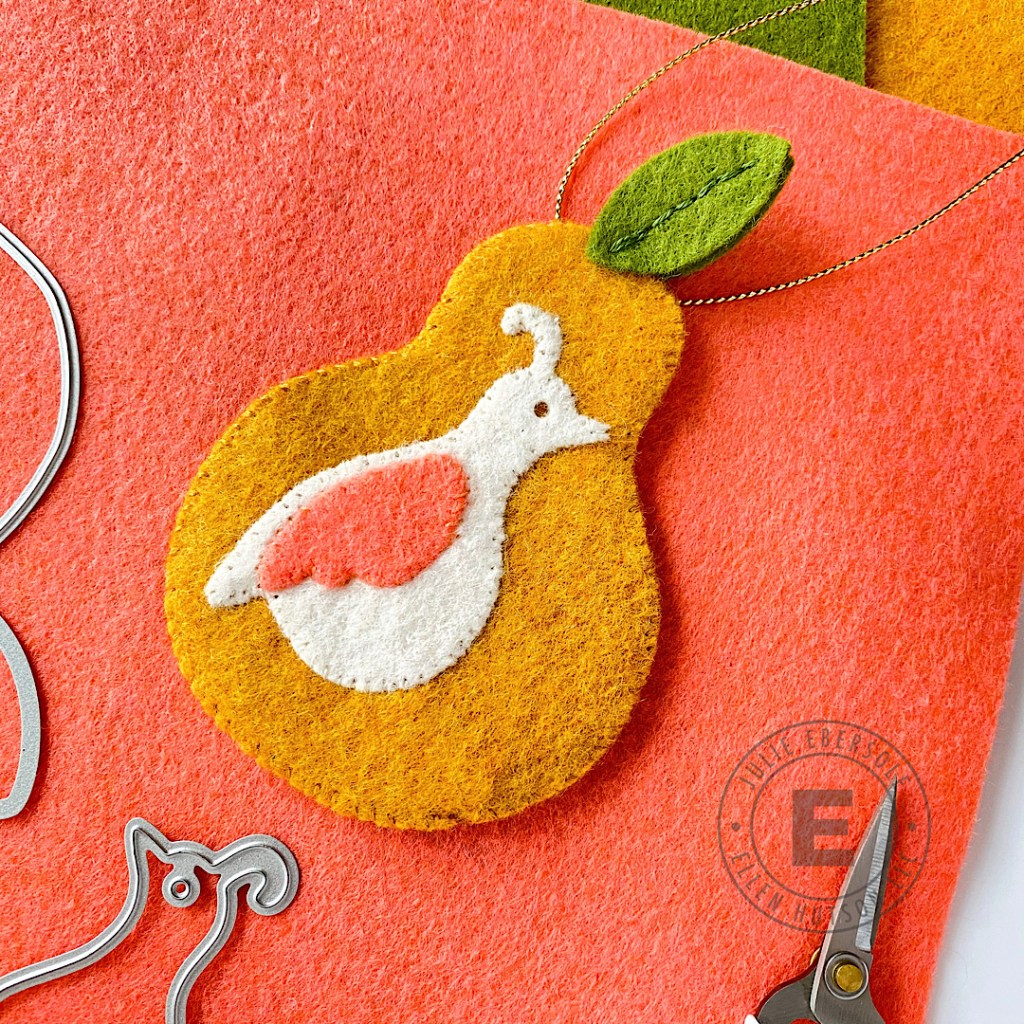
You don’t have to be experienced at sewing or embroidery to make darling hand-stitched ornaments! Grab your felt and a needle as Julie shows you how she made her Partridge In A Pear Tree themed ornament!
Hello, Julie here today! Over the years, my Christmas tree has had various different themes but I have to admit that my favorites have always been ones that included handmade ornaments! This year, I’m excited to make an entire set in felt, featuring the 12 Days of Christmas! There are so many gorgeous colors to choose from in the kit and, best of all, felt ornament are so cozy looking AND unbreakable—I won’t have to worry about my young granddaughters handling them during the holidays. WIN!!!

After making my first hand-stitched tree ornament, even tho I find hand-stitching relaxing and therapeutic, I realized what I could do to speed the process up–especially since I’m going to make a set of 12– and have some suggestions below:
TIPS:
- To speed up assembly of an entire set of 12 Days ornaments, pre-prep by die cutting the parts for each ornament and storing them in individual zip loc sandwich bags. This way, they’ll be ready when you have time to relax and stitch away.
- If you’re a beginner to hand-stitching and embroidery, use easy/simple stitches; you can always add more elaborate embroidery stitches later if you choose.
- To add body/stiffen the ornament’s overall shape, die cut an insert from lightweight chipboard, which is relatively easy to find (hello, cereal boxes, etc.)—just trim it down so you have enough room to stitch the front and back layers of felt together. I found this easier than trying to use a liquid stiffener, and ZERO mess! WIN!!!
- No time/desire to sew? Use Peel N Stick sheet adhesive to secure layers together quickly/easily. This is also great when working with kids!


2 Comments
This is an amazing set. How I wish it were not so expensive…can not justify spending this much. But I would love to see these!!
Darling ornament, love the pretty colours.