
There are so many creative ways to incorporate thread on your card fronts using stitched dies. Today EH Design Ambassador, Adelina, is sharing some weaving techniques for incorporating embroidery floss as a background for your card designs.
The art of weaving has always been something that interests me. There are so many trends right now for woven wall hangings that integrate a variety of materials into a single piece and create a unique visual texture. I thought it would be fun to share 3 ways of utilizing some weaving techniques using the new Essential Rectangles dies for your card backgrounds. I paired these backgrounds with the new EBE Hit That stamp set + matching dies designed by Julie Ebersole.

The first of the 3 ideas utilizes the white space of your card with the texture of embroidery floss. This card admittedly isn’t really “woven” so to speak, but more threading the embroidery floss in a unique pattern to create the background texture.
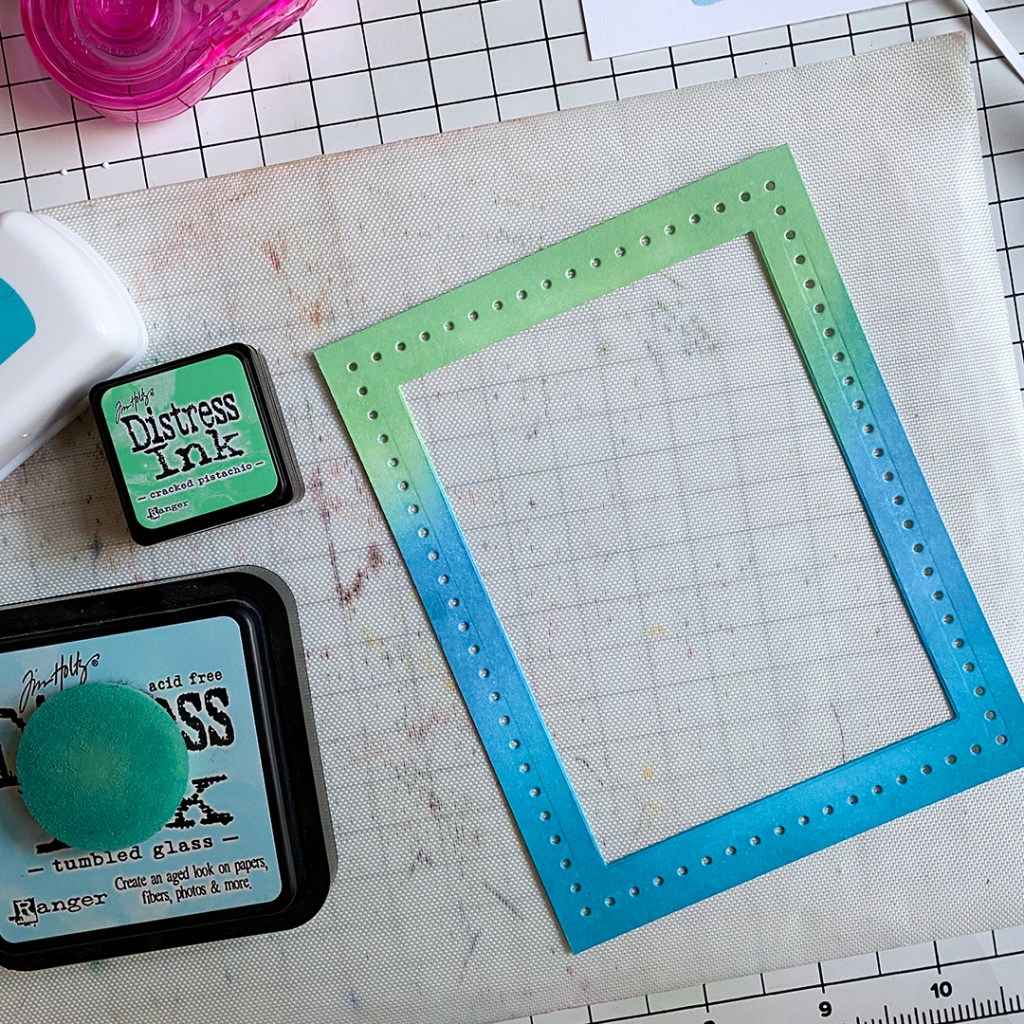
I used my blending brushes and Ranger foam to create a blended background on 80 lb cardstock. Then I die cut a frame using the Essential Rectangles dies. They coordinate perfectly with the new Essential Stitching dies. Once the holes were cut, I pulled out a coordinating embroidery floss. The intent was for this background to be somewhat delicate, so I pulled about 18″ of embroidery floss out and cut it. Then using a single strand and an embroidery needle, I threaded it in a unique pattern. In some areas I twisted the thread around itself to create some tension and depth.

With just a few brightly colored sequins to finish it off, this card came together really quickly! The piñata is adhered with foam tape and has just a little glitter for some fun sparkle!
Once I got comfortable threading the embroidery floss in a random pattern to get the look I desired, I decided to push myself a little more. Testing some very basic weaving skills, my next project integrates crepe paper!

I cut another 18″ length of embroidery floss, except this time I used two strands of thread. Instead of threading in a random pattern in one direction, I threaded vertically and horizontally. If you run out of thread while going through this process, don’t panic. It happened to me several times! I just used scotch tape to adhere the thread in place on the back of the card front, pulled out another two strands of thread and kept going until I reached my desired pattern.

Next I cut some strips of crepe paper, adhered one end down and wove it through the thread. There is no rhyme or reason to my pattern. My intent was simply to add some symmetrical pieces that would contrast with the randomness of the thread. I used some double sided tape to adhere the ends, but you can use any adhesive that works for you.

You probably saw this next idea coming, but you almost HAVE to use the Action Wobbles for the piñata. Seriously, it’s the absolute CUTEST idea. I have a stash of them in my studio and always forget to pull them out. When I saw the EBE Hit That stamp set by Julie Ebersole, I knew I wanted to use them. I can now consider that purchase justified! LOL

I colored a few of the candies in coordinating colors with my Copic markers and adhered them to the background. That orange is not subtle, but I think it plays to the cultural aspects of the origins of the piñata. *laugh*

For this last card I went ALL OUT! Interactive, lots of weaving and three different materials. It was so much fun to make! A few searches on Pinterest and you’ll turn up several weaving techniques that can be used for your cards.

I kept the weaving aspect super simple. Two strands of thread are threaded in a symmetrical vertical pattern through holes made using one of the Essentials Rectangles for Stitching. I wove felt, patterned paper and cardstock to create my background.
For the interactive part, I used the EBE Swing N Slide dies by Julie Ebersole. I cut my pink cardstock to be 2-3/4″ x 4-1/4″. Then I cut one of the small Swing N Slide dies from it. I saved the piece that I cut out with the die and adhered it under the location of the opening so that you couldn’t see the white card base from the front.

My Favorite Things has these great little oval slider elements that can be used with the slider dies. I prefer the oval to the circle elements so that the image doesn’t flip upside down. The oval keeps the image on the slider track so it looks like it’s swinging on a rope!
I adhered the slider element between two circles of 110 lb white cardstock. Then I adhered my piñata image over it. I recommend placing the oval slider element in the slider opening and then adhere the discs. It makes it much easier for assembly.

I used the natural twine as the rope for my piñata image. I did add just a little sparkle on the edge for added visual interest. I really like how this textured background turned out. You can use yarn, twine or vary the widths of felt you use! The options are endless and they can range from really simple to as complicated as you’d like for the weaving.
Thanks for stopping by today. I hope you’ll try a few of these techniques out. Have a great day!


No Comments