
EH Design Ambassador Emily Mydlowski is joining us today sharing her take on A-Tisket-A-Tasket by filling up the Life’s a Picnic Basket with fun goodies to create matching-themed tags for gift basket giving.
Hi Friends, Emily here sharing a fun way to stretch your stamps to create themed Gift Basket Tags that are sure to have you signing/humming “A-Tisket, A-Tasket I’m off to deliver my Homemade Gift Basket” 🙂

My favorite part of creating homemade gift baskets is the entire process of curating a special experience for the recipient. From finding a fun and reusable container to shopping for all the products in different shapes and sizes and then assembling all the goodies into the basket so you get little peeks of all the fun inside. I followed this same process when creating the Themed Gift Basket Tags.
I found the Picnic Basket Image from the EBE Life’s a Picnic by Brandi Kincaid to be the perfect size to fill with multiple “products” and you can color-customize the basket liner to match your theme. With the Picnic Basket image in hand, I went “shopping” for products in my EBE Leading Ladies and Bear Ware Stamp Collection since they have so many cute little accessory images that led me to the following Gift Basket Themes:
Girls Night Pajama Party
- Color Palette: Aqua, Pinks and Gold
- Leading Ladies: Binge Watching
- Gold Washi Tape Accents

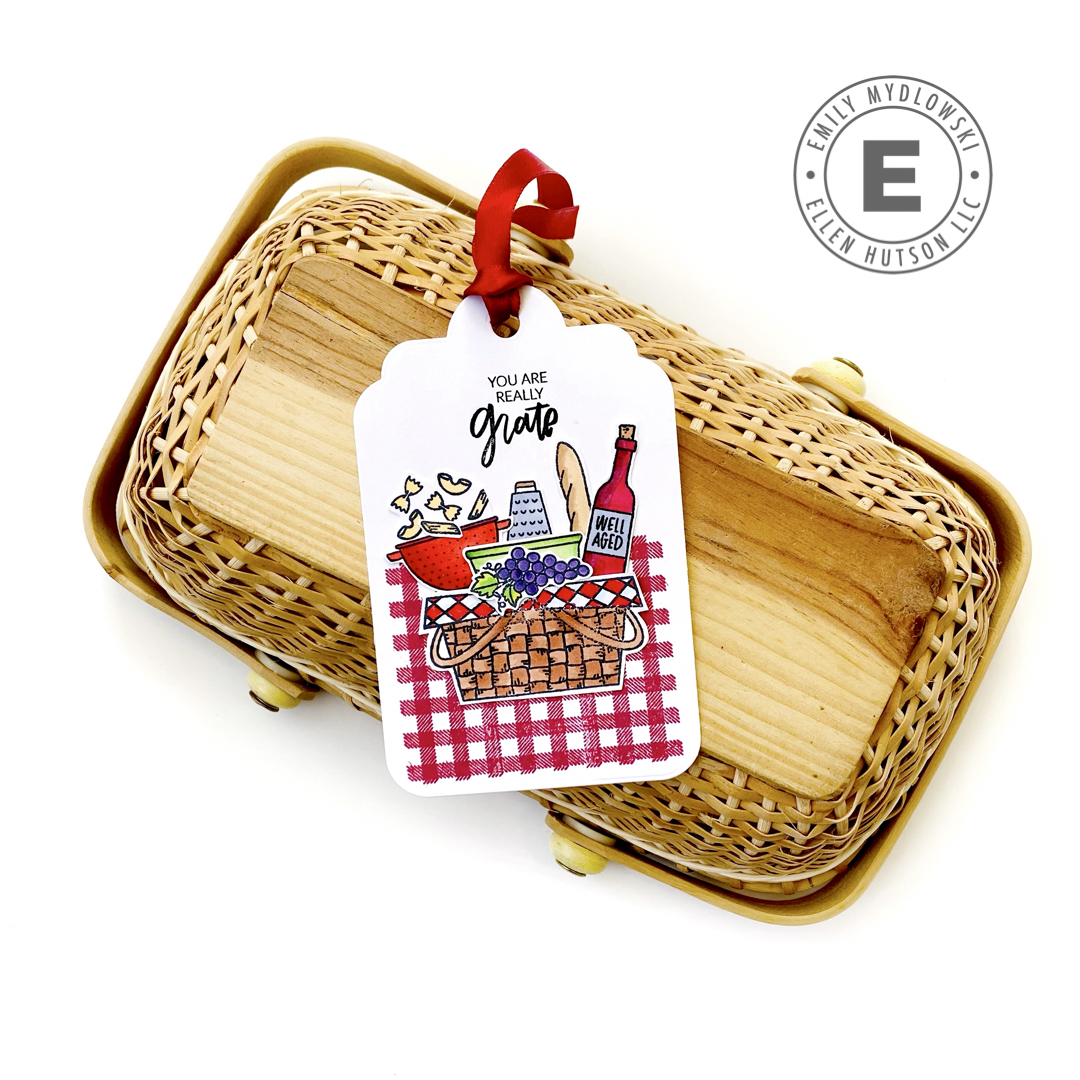
Date Night Pasta Dinner for Two
- Color Palette: Red & White
- Leading Ladies: Cooking Lady
- Red/White Checked Tablecloth Background
Gardener’s Delight
- Color Palette: Vibrant Greens & Primary Colors
- Leading Ladies: Plant Lady
- Green Garden Patch Background

Baking Essentials
- Color Palette: Baker’s Blue and Sunshine Yellow
- Leading Ladies: Baker Lady
- Blue Polka Dot and Daisy Background

Hoppy Easter Basket
- Color Palette: Springtime Pastels
- Bear Ware 3 and Little Chick from Good Egg
- Yellow and White Daisy Background

Gift Basket Assembly

The Basket: I stamped the basket several times to Solar White Cardstock and colored each basket with an assortment of Copic Colors.
The Gift Basket Goodies: I placed all the little images on my MISTI and then stamped everything all at once to one piece of Solar White Card Stock. Then I went to work Copic coloring the items to match the theme colors and either die-cut or fussy cut.
Arrangement & Assembly: I arranged-rearranged-arranged again all the goodies into the basket. Once I liked the placement of items, I used Press-N-Seal to keep all the images in place while I turned over the basket and goodies to secure them in place with a thin piece of clear tape. After securing the items in place, I added foam tape squares to the back image to adhere to the tag. For a little extra fun and dimension, I adhered addition items like the slippers to the front of the basket.


Tag Assembly:
I used the EBE Tag Trio by Christine Herrin Designer Dies because the sizes of these tags are amazing…perfect for adding elements and building scenes with lots of room for sentiments too! I added a background layer to each of the tags using washi tape, pattern paper or images from EBE Plaid Maker and Pattern Play Stamp Sets. To finish the tags, I added a theme-inspired sentiment with VersaFine Clair Nocturne Ink and attached a matching ribbon.

So there we are friends, a fun way to stretch your stamps to create a basket full of themed tags for that perfectly curated gift basket experience. Big Paper Hugs!


2 Comments
Emily! These are fantastic! Love all the details!
Super cute and such a fun idea!