
Have you got a few more summer-themed cards to make? EH Ambassador Angela Simpson shares a fun way to use the Essentials by Ellen Everything’s Beachy stamp set, and she’s got a few tips to help make stamp masking a breeze.

Hi crafty friends! Angela here, and today I’ve got a very beach-inspired card to share. I don’t know about you, but I’ve been having SO much fun with the recent Essentials By Ellen Summer of Stamping Release. Even though I haven’t spent much time at the beach this summer, the Everything’s Beachy stamp set certainly makes me feel like I have! Today I’m going to show you how I used stamp masking to create the overlapping umbrella card you see here.

If you’re new to stamp masking, not to worry – I don’t consider myself particularly experienced with it either! But along the way I’ve learned a few tips and tricks, so I’ll share those as I walk you through the process. To begin, I stamped several of the umbrella outline image on masking paper, then cut them out with the coordinating die. Since the die leaves a small margin between the end of the stamped image and the cut-out shape, I trimmed as closely as I could around my stamped images with my fussy cutting scissors. With my umbrella masks ready, I peeled off the back of the masking paper and temporarily stuck them around the frame of my white card panel. This helped me get a sense for where my first round of umbrellas (the pink ones) would be stamped.
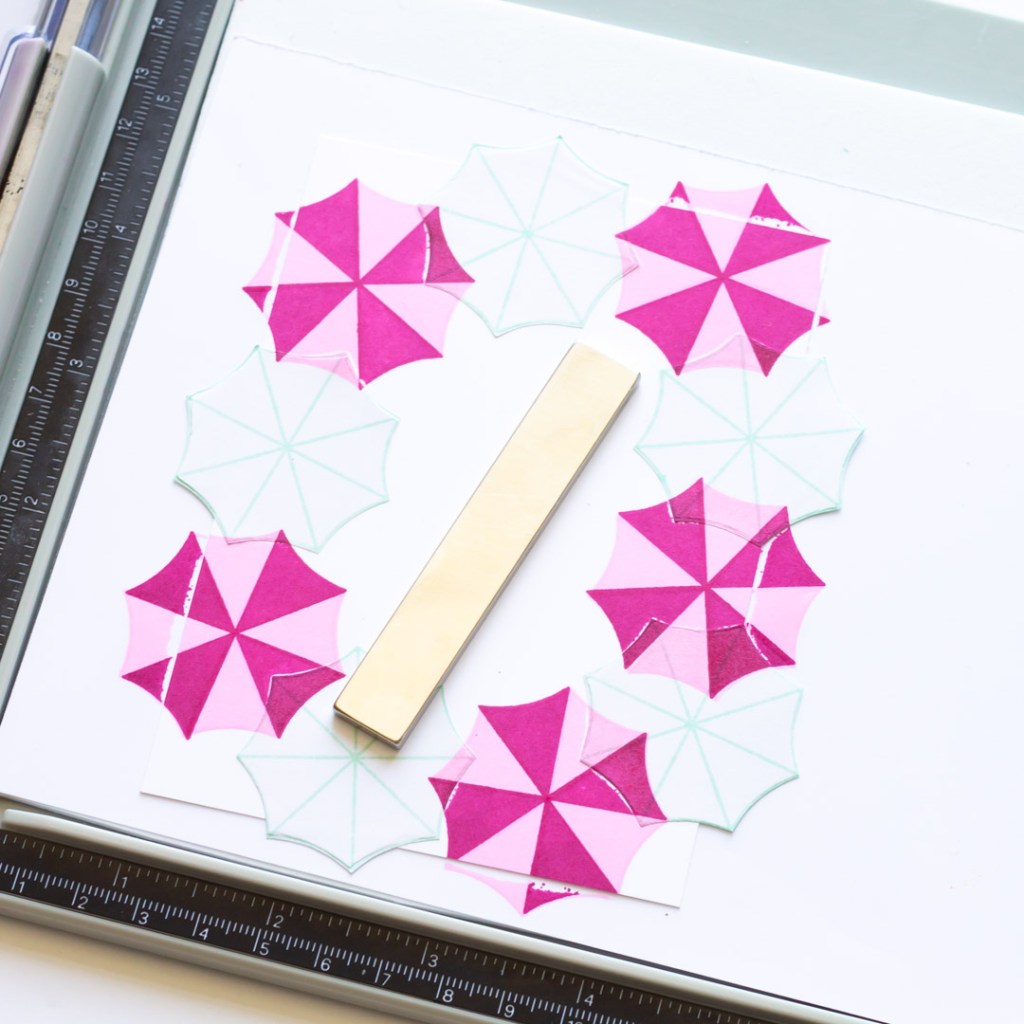
As I worked my way around the frame of the panel stamping my pink umbrellas, I made sure that I left some time between stamping the light and dark shades. This allowed the ink to dry, which I’ve found produces more crisp images. (On the other hand, if the ink is still wet, the colors tend to blend into each other.)
Once my pink umbrellas were complete, I peeled off the masks and did the same process again, filling in the areas with my teal/mint umbrellas. One thing to note here is that even though I took the time to fussy cut my stamp masks, there was still a little bit of white space in some areas after I’d completed all my stamping. If I owned markers that exactly matched my inks, I could have filled in the gaps with those. Sadly that’s not the case! Instead I lined up my solid umbrella stamp ever so slightly offset from my original images, so that they’d touch the affected white areas on the card panel. With the stamp positioned exactly where I wanted it, I used my stamping platform to re-stamp, filling in the white gaps. This totally did the trick!

I used the All the Feels die to cut two layers – one from glitter cardstock and another from Concord & 9th Peacock cardstock. After stacking them on top of each other, it was time for my card assembly…. but I felt like something was missing. I wanted to create some shadows under the umbrellas, as if you were looking over a pool deck from above. To do this, I reached for my fussy cutting scissors, held my breath, and began to cut out the middle of my umbrella panel to create a frame.

Next, I used the A2 piercing plate to create my pool deck panel, and mounted my umbrella layer on top with foam tape. This created the dimension I was looking for, and all that was left to do was adhering the sentiment die cut and a few sparkling clear sequins on the umbrellas.

Feeling ready to give some simple stamp masking a try? I’ve linked up all the products used on this card below for easy shopping. Thank you so much for stopping by, and I hope that the rest of your summer is fabulous!


No Comments